Friday, July 25, 2008

detail post #4: the guest book

Now on to the one DIY project that heard about the most from our guests - our guestbook.

For a long time, we just assumed that we would go to craft store, pick out a cute, relatively inexpensive guest book and say "done". No fuss, no mess, no hours spent on another project. But, then we got to thinking about it....we wanted to have something that wouldn't end up dusty and stored away in a closet or a box somewhere. We wanted it to actually tell the story of our six year relationship and feel like "us". All of this of course meant that another project had to be added to our list. So we made this:


(click any of the photos to enlarge)


Actually, Blurb made this, we just designed and formatted it all. Our book was the smallest (7x7 inches), cheapest ($25 with the help of an online coupon) hard bound option they offered. We were happy with their print quality, the thickness and glossiness of the interior pages, and their easy design and formatting options. If I were to grade them, I'd give them an A, and we'll probably use them again for future projects.

Jesse has probably never thrown anything away in his life. It's a personality quirk that I usually curse but came to treasure during the making of this book. It meant that we still had school ID cards from the year we met, receipts from our first date, notes and letters that we'd written each other, and ticket stubs to nearly every movie, concert and play we'd attended together. And we packed all of that stuff in, surrounded by years of photo booth strips and short written descriptions to give our guests a handy 40 page synopsis of our relationship. We were happy with how it turned out, but even happier with the well-wishes and nice notes that our guests wrote inside (these photos were taken weeks before the wedding - the lined pages are now covered with awesome-ness).

next detail post: misc. last minute design projects

Wednesday, July 23, 2008

Mariano is such a tease

The rest of the detail posts have to wait for the moment because our incredibly awesome photographer, Mariano Delgado, just e-mailed me three unedited teaser photos from our wedding day!


click each photo to enlarge. All images copyright Mariano Delgado.

I'm practically salivating at the jaw to see the rest of them. Mr. Delgado must be magic. That's the only way he could have made my very ungraceful trip-slide-fall-fall-slide down that little hill in three inch heels and layers of tulle look so elegant. Jesse just looks as dapper as always.

Tuesday, July 22, 2008

detail post #3: the table cards

We decided to keep our tables organized by numbers, rather than naming them after significant landmarks or species of wildlife or something else just as esoteric, because Jesse and I are rather simple people and numbers are easy to follow. But, because I just can't seem to leave any project without some sort of unnecessary work, we designed them as folding stand up cards with the numbers on the front acting as age numbers and corresponding photos of us at that age on the inside. Why am I even describing this - the photos explain it all:

(click to enlarge)

Front view. We had nine guest tables and put table zero (our newborn photos) at our sweet heart table.


(click to enlarge)


(click to enlarge)

My favorite of the interior photos. Unknowingly, and from different states, our mothers dressed us in matching outfits for our kindergarten photos. You can see more examples of the rest of the cards here.

They were pretty easy to make. Scanning and cleaning up all the photos took a little time, but gave us a great excuse to dig through our parents' old albums again. We designed them using Adobe Illustrator and printed them out on white card stock with out ink jet printer. These also helped to persuade us not to make any sort of video to show during the wedding reception. We figured between these photos and our guest book (which I'll post about next), our guests would have their fill of our shiny mugs. Also, we completely ran out of time.

next detail post: the guest book

Sunday, July 20, 2008

detail post #2: the favors

Jesse and I knew from the start that we didn't want to go the tchotchke route with our wedding favors. I wouldn't have much use for a picture frame or mug engraved with another couples' name and wedding date, so why would our guests? We did want our favors to be fun and kinda silly, but also include something edible, because not everyone likes "silly", but who doesn't like free eats?

We fell in love with the carnival grab-bag feel of the favors used at these two weddings, and decided to completely steal their ideas and pass them off as our own.

our inspiration

L: martha stewart's weddings winter 2006 via oh happy day R: knottie academy beldam

(click to enlarge)


our favors

(click to enlarge)

And a breakdown of what's inside and where they came from for anyone else who wants to be "inspired" as well:

1. The zip lock bags were ordered in bulk from lemelange.com.

2. We used a free online generator to make a personalized crossword puzzle and then I redesigned a prettier version using Adobe Illustrator. We printed them out with our trusty ink jet printer on cream card stock with the answers on the back.

3. #2 pencil from staples (for filling out the crossword). Jesse was awesome and sharpened at least 75 pencils beforehand.

4. The Wilbur chocolate factory is right next door to our ceremony site in Lititz, so we had to include a bag of Wilbur buds (like larger versions of Hershey kisses).

5. Two swirly candy sticks in complementary colors bought from the local penny candy store in bulk because they're pretty and not everyone likes chocolate.

6. The boys got fake moustaches* (ordered from www.dealextreme.com) and the girls got see-through paper glasses (ordered from oriental trading). We would have included both in everyone's bag, but we were determined to stick to our favor budget and figured people would trade with their friends if they wanted to.

*A note about the moustaches - their original backing was kind of ugly, so Jesse designed new cards to stick them to - I think he did a super fantastic job. Also, I heard from a few guests that not all of their sticky backs came off. They were really, really cheap, so it was to be expected, but I saw enough guests wearing one to know that most did work.

7. Jesse also designed some cards with different retro cameras on the front and instructions on the back for uploading digital photos to our flickr site. We printed those with a laser printer and included one in each bag.

So, that's it. Jesse designed the tags that we stapled to the tops of the bags. They served double-duty as escort cards as well as favor tags, so that when the guests entered the reception, they could pick up their favors and figure out which table they were assigned to at the same time. I love combining two projects into one.

Jesse picked up so much design slack the last two weeks before the wedding because I got swamped with illustration assignments. I was so happy with everything that he created for this project that I wish I had given him all of the design duties from the get go.

Even if our guests didn't notice his killer design and typography skills, I think some of them still enjoyed the contents.

(various guests' photos - click to enlarge)

next detail post: the table cards

Wednesday, July 16, 2008

detail post #1: the dress(es)

Since our professional photos won't be ready for another 2-4 weeks, we figured we'd pass the time with some posts covering all of the wedding details we hadn't already described. These are things we hadn't posted before either because we didn't want to ruin the surprise for our guests or because we were still working on them up until the wedding.

Since our guests have already seen all of these details in person, these posts are geared mainly toward readers who might be planning their own weddings.

The first detail to report, of course, is the dress. Or I should make that the dresses, because I kind of became of a "two dress bride" (albeit a very cheap one).

I posted earlier about finding my wedding gown. I loved the thick silk material, its 1940s style and shape, the buttons that ran down the back, the rounded seams in the front, and most of all its extremely affordable price.....but it was at least 3 sizes too large.

I found a fantastic seamstress in Lititz (where we got married), who was much more affordable than most of the ones in Philly and after several trials, she magically shrunk my dress. She even made a few other modifications at my request which made the dress almost begin to feel like a couture creation. The cathedral train was dramatically shortened, a one point bustle was added, the neckline was pulled back further, and the beads at the center of the v-neck were removed completely. In the end I got the dress of my dreams for $300 total. I love how it turned out and would highly recommend Karen Chow to anyone needing alterations in the Lancaster County area of Pennsylvania.

Before

(click to enlarge)


After

(click to enlarge)

My dress was super comfortable (one of my requirements while dress shopping) and I would have worn it all night long, but I needed a second, shorter dress for our getaway (I'll cover more on that soon). I had envisioned a fun, slightly retro party dress for this one, but it had to be cheap since I hadn't left any room in the budget for it. About a month before the wedding, my mother-in-law took me on a mad dash through most of the stores in their mall and I found this one at Boscov's department store:

(click to enlarge)

this photo was taken during my last hair trial and the band-aid on my ankle is due to a the worst cut i ever got while shaving, only a week before the wedding....like i said, i'm a complete klutz.


It was in the junior's department along with the after prom "sale" dresses, marked down from $65 to $20. And because I can't seem to leave anything well enough alone, I removed a couple of bows in the front and added an extra layer of tulle to make the skirt a more poufy. I felt like a glitter-y ball of party tulle while wearing it which pleased the 5 year old inside me to no end.

Next detail post to go: the favors

Monday, July 14, 2008

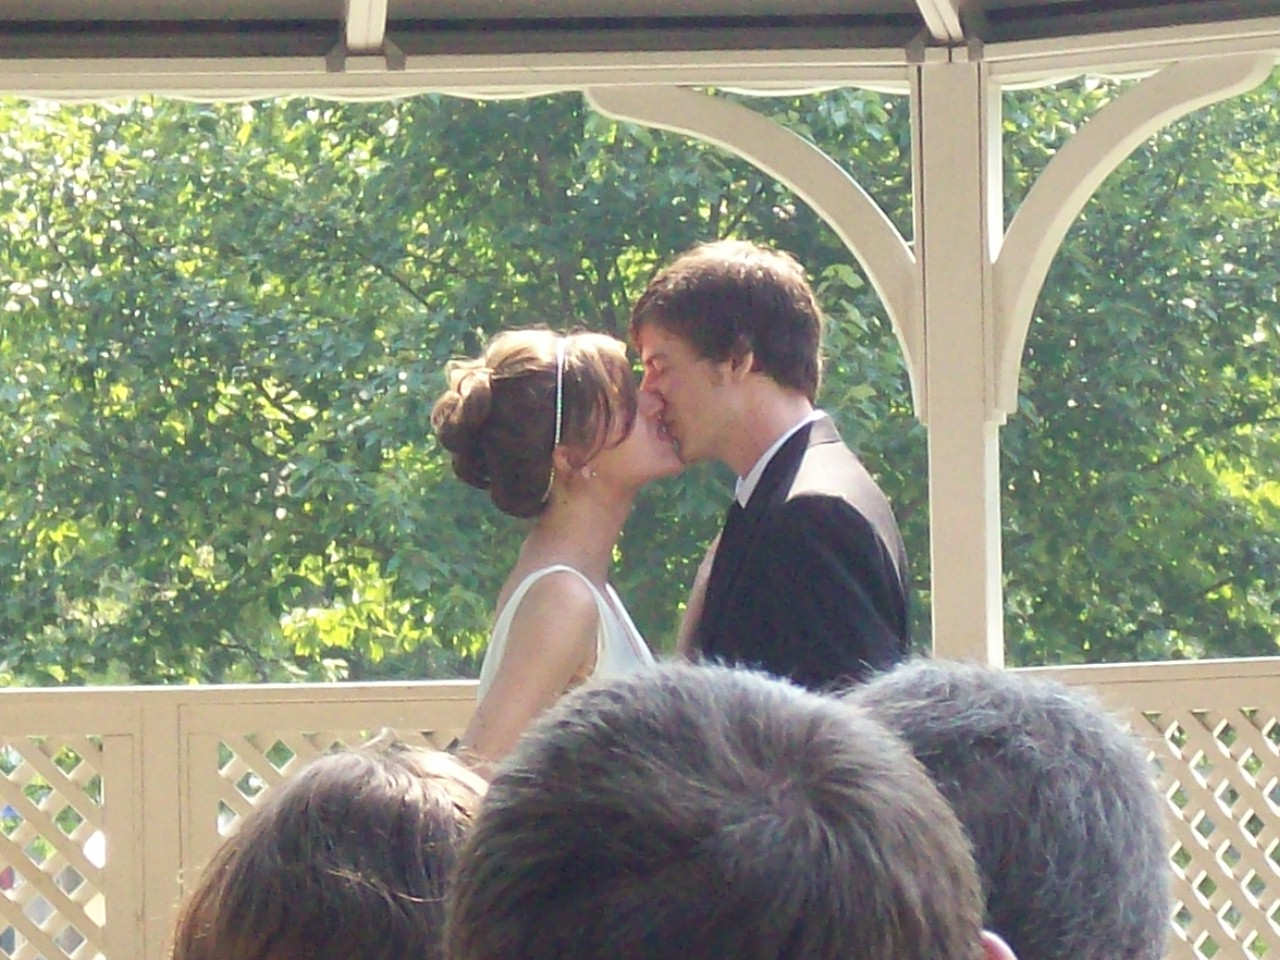
We Survived!!!

photo by Jen Colburn (I think?)

It was getting crazy the closer we got, but both Deanna and I somehow survived the wedding and made it through. We had a wonderful time and want to thank everyone for coming. It was so nice to see all of the people we love in one room together. You can see some of the pictures people have posted from the wedding so far at our flickr site:
http://www.flickr.com/photos/jessedeanna
If you would like to upload your own photos to share with everyone, and you lost your photo upload instruction card, feel free to email Deanna or me and we can give you the name and password. ( deannastaffo@yahoo.com or jesse_turnbull@yahoo.com )
We'd like the thank everyone for your help, long trips, and for sharing our special day with us. Once we get our professional photos back, and maybe some video, we will post them on the blog.
-Jesse